You need more space and want a build route that is fast, warm, and tidy on site. Traditional masonry can feel slow, weather-bound, and disruptive.
Weeks of wet trades can drag on. Costs creep. Planning and Building Control feel confusing. You hear claims about kits that go up in a day, but you also see stories of delays, moisture issues, and lenders nervous about timber cladding. Choosing the wrong approach risks a chilly room, swollen budgets, and a frustrated household.
A well-designed timber frame extension can deliver space quickly with excellent thermal performance and low disruption. This guide gives you a clear UK pathway. You will learn the build options, planning route, exact layers that keep timber dry and safe, realistic cost bands, a week-by-week programme, a risk checklist, and a ready-to-copy specification that helps you get accurate quotes.
What is a timber frame extension?
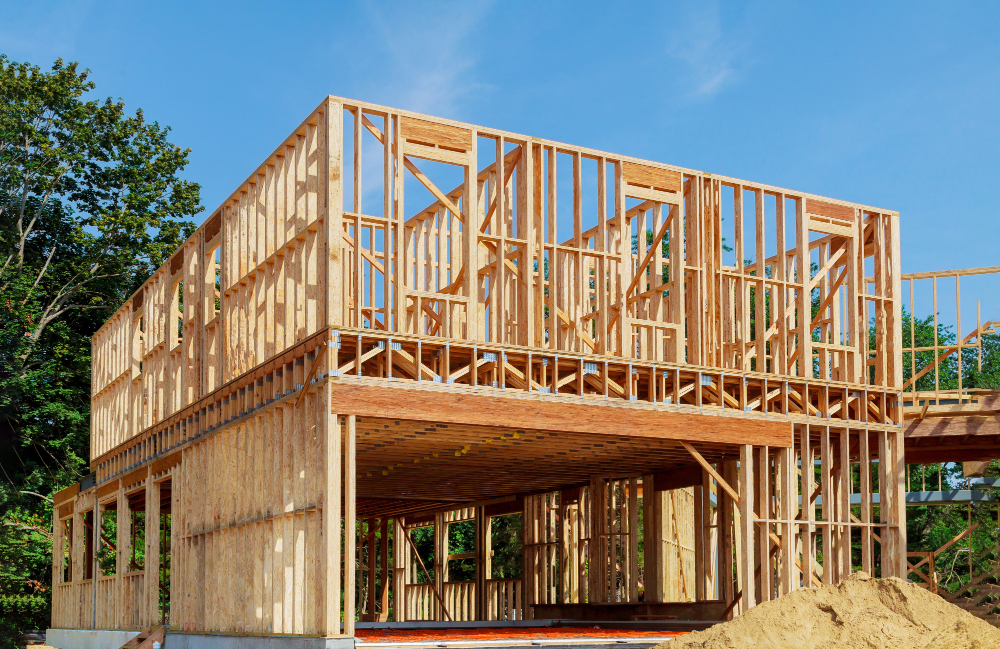
A timber frame extension uses a structural timber skeleton to form walls and roof. In the UK you will see three main approaches.
- Stick build. Carpenters assemble studs, plates, and sheathing on site. Flexible for awkward tie-ins and tight access.
- SIPs. Structural Insulated Panels have an insulation core between OSB skins. Fast to erect with precision.
- CLT. Cross-laminated timber panels form structure and finish in one. Premium feel, higher cost, best planned for good access and craneage.
All three can deliver a warm, airtight shell. The right choice depends on design complexity, access, lead time, and budget.
Are timber frame extensions quicker?
Yes, if you plan to use dry construction and align lead times. A typical single-storey rear extension of 18 to 25 square metres can reach weathertight within days once foundations are ready. Off site manufactured panels reduce on site time. Even stick-built is fast once materials arrive. Time savings are reduced if you still pour heavy slabs, rework complex steel tie-ins, or change cladding late.
Key time drivers
- Lead in for engineered timber, steel, and windows
- Access for panels or cranage
- Weather window for groundwork only
- Coordination of design information before order
Are they cheaper?
Timber frame can lower labour time and reduce temporary works. Total cost depends on the specification and finishes. Use these broad UK bands to build your budget awareness for a single-storey rear timber frame extension of typical size.
- Foundations and groundworks. Low to medium, site dependent
- Structure and shell. Stick-built usually has lower material cost but more on-site labour. SIPs higher material cost but are quicker to erect
- Cladding and roof. Big swing item. Brick skin costs more and takes longer. Lightweight cladding can be faster and cheaper
- Windows and doors. Often, the single largest line item after groundwork
A practical rule. Choose the frame method that best suits access and design, then keep details simple and repeatable to control labour.
Planning permission and permitted development
Many rear and side extensions can proceed under Permitted Development if they meet limits on depth, height, eaves height, and materials in context. Detached homes may allow greater depth than semis or terraces. Always confirm constraints for conservation areas, listed buildings, and Article 4 zones. If you need planning permission, a clear set of drawings and a short design statement that explains massing, materials, and neighbour impact will help.
Your planning and PD checklist
- Existing and proposed plans, sections, and elevations
- Location plan and block plan
- Roof form indicated in section
- Materials noted, especially cladding and roofing
- Daylight and shadow to neighbours if depth is ambitious
- If under PD, keep evidence drawings and measurements on file
- Prior approval where relevant for larger home extensions route
Building Regulations. What to plan for
Timber frame must satisfy structural safety, fire safety, moisture control, thermal performance, and ventilation. Plan these early with your designer and structural engineer.
- Part A Structure. Engineer sizes studs, plates, lintels, and any glulam or steel.
- Part B Fire. If near a boundary, external wall build-up must be non-combustible to a one-hour rating. Internal linings are usually fire-rated plasterboard.
- Part L Energy. U values for walls, roofs, and floors, plus airtightness. A SAP assessor may be needed to show compliance.
- Part F Ventilation. Background ventilation and extract sized to use.
- Part O Overheating. Check glazing areas and shading for south or west-facing rooms.
- Part C Moisture. Correct layers to resist rain, allow vapour to escape, and prevent interstitial condensation.
Moisture control and breathability. The layer cake that keeps timber happy
Get the layers right, and a timber frame lasts. The goal is to shed rain, allow vapour to exit, and stop internal moisture from entering the frame.
Typical wall from inside to outside
- Internal lining. Fire-rated plasterboard
- Vapour control layer with taped seams
- Service zone battens to keep fixings away from the VCL
- Insulated stud zone. Mineral wool or wood fibre between studs
- Sheathing board on the outside of studs
- Breather membrane to shed water and allow vapour out
- Ventilated cavity on counter battens
- External cladding. Brick, timber boards, render system, metal, or fibre cement
Roofs follow the same logic. Warm roof build-ups place rigid insulation above rafters with a continuous air and vapour barrier below.
Fire performance near boundaries
Where a wall is close to a boundary, the external surface and build-up may need to be non-combustible for a defined period. Many projects answer this with brick, stone, fibre cement panels, or metal sheeting on a rated carrier board. Inside, use fire-rated plasterboard and follow the engineer and Building Control guidance for any beams or columns.
Foundations and floors
Timber frame is light, which can reduce foundation depth on suitable ground. Options include strip foundations with a suspended timber floor or a concrete slab with a timber frame above. On clay or variable ground, an engineer may specify deeper trenches or piles. Design drainage and ventilation paths early, and keep the finished floor level high enough to resist splashback.
Cladding choices and lender comfort
You can match your home with brick or contrast with timber boards or metal. Lenders are often most comfortable with brick or stone on the main elevations. A blend can work. Brick to boundary and garden facing timber or metal to add character. Whatever you choose, confirm lender and insurer requirements if you plan to borrow against the property.
Windows, doors, and glazing
Large sliders and roof lights make the dramatic difference. Plan structure around openings. Glulam portal frames or discreet steel can hold wide spans with minimal posts. Order windows early due to lead times. Aim for low U values, warm edge spacers, and trickle vents as required.
A realistic sequence for a single-storey timber frame extension
Week 0 to 4
- Measured survey. Concept design. Budget check
- Pre-planning check or PD route confirmed
- Structural strategy agreed
- Outline spec chosen. Brick or lightweight cladding
- Early window schedule and sizes
Week 5 to 8
- Planning drawings submitted or PD evidence prepared
- Structural design progresses
- Energy and ventilation compliance checked
- Quotes requested. Site logistics planned
Week 9 to 12
- Planning decision or PD confirmation ready
- Final construction drawings signed off
- Order frame and windows. Lead times agreed
- Book groundworks start and skip permits
Week 13 to 16
- Groundworks and foundations
- Drainage and services set outs
- Slab pour or suspended floor installed
Week 17 to 18
- Frame erection. Stick build on site or panel install
- Roof structure and sheathing
Week 19 to 20
- Waterproof layer and cladding rails
- Windows and doors installed
- Weathertight achieved
Week 21 to 26
- Services first fix and insulation
- VCL installed and tested for continuity
- Plasterboard and internal finishes
- External cladding complete
- Second fix, decoration, snagging, Building Control sign off
Timings vary with access, weather for groundwork only, and supplier lead times. The dry shell phase is where the timber frame shines.
Risks and how to manage them
- Access and cranage. If panels are large, check if a small crane or hiab can reach. For tight sites, plan stick build or smaller panel sizes.
- Movement joint at tie in. Provide a movement gap where the new meets the old with stainless channel ties and a flexible seal.
- Interstitial condensation. Do not skip the VCL or the tape. Penetrations must be sealed.
- Lead times. Order frame and windows with design frozen.
- Foundations on unknown ground. Allow a contingency for deeper trenches or a reinforced slab.
- Neighbour impact. Manage site hours and deliveries. Keep fence lines and drainage clear.
Costs. Building a sensible budget
Costs vary by region, access, and spec. For planning, group your budget by element and decide where to invest.
- Groundworks and foundations. Site dependent
- Structure. Stick build can be cost-effective for simple shapes. SIPs are faster but higher material cost
- Roof. Flat roof with single ply is common. Pitched roof with tile or metal gives character
- Cladding. Brick skin raises cost and time. Fibre cement and timber boards are quicker
- Openings. Doors and glazing can take a large share. Consider a single hero opening rather than many small upgrades
- Interiors. Heating, flooring, joinery, lighting
- Professional fees. Architect or designer, engineer, surveys, planning fees, Building Control, SAP
- Contingency. Keep ten per cent for unknowns
Sustainability choices that make a difference
- FSC or PEFC certified timber only
- Mineral wool or wood fibre insulation
- Timber or aluminium-clad timber windows
- Lightweight cladding to keep embodied carbon down
- Avoid oversizing steel. Use glulam where suitable
- Design for airtightness, then ventilate right
- Consider a roof build that allows future solar
Heating and comfort
With good insulation and airtightness, heating demand drops. Underfloor heating works on slabs. On suspended timber floors, low-temperature radiators can be effective. Control solar gain from south or west with shading or select glass with solar control coatings. Test for drafts with a blower door where practical.
Aftercare and maintenance
- Timber cladding. Recoat or oil at intervals advised by the product. Expect colour change over time if left untreated.
- Sealants and movement joints. Inspect annually and renew when cracked.
- Gutters and downpipes. Keep clear to avoid splashback.
- Ventilation. Clean extract fans and check trickle vents.
A homeowner-friendly specification template
Copy and adapt this to brief your designer and contractors.
- Project. Single-storey rear timber frame extension about X square metres
- Structure. Stick build timber frame to engineer design or SIPs to supplier design. Studs sized by the engineer. Provide a structural certificate
- Walls. Internal plasterboard with fire rating as required. VCL with taped seams. Insulated stud zone. Sheathing board. Breather membrane. Counter battens for a ventilated cavity. External cladding as below
- Cladding. Garden elevation timber boards or fibre cement. Boundary elevation non-combustible lining or brick
- Roof. Warm flat roof with rigid insulation above deck and single ply membrane. Roof lights as per drawings
- Openings. One large slider to the garden. High-performance glazing with low U-value. Trickle vents or alternate compliant ventilation
- Thermal. Whole wall and roof U values to meet or beat current Part L targets. Airtightness target set and VCL continuity inspected before plasterboard
- Services. Radiators or underfloor heating as design. Mechanical extract in kitchen and wet rooms
- Fire. Boundary treatment to meet the required external wall rating. Internal linings fire rated
- Movement joint. Provide stainless channel ties and a compressible seal between the new and existing
- Documentation. Provide as-built drawings, structural calcs, product warranties, and Building Control completion certificate
How to brief your lender and insurer?
- Confirm the extension is engineered, certified, and inspected by Building Control
- Note that the external finish to any boundary elevation is non-combustible
- If using timber cladding, confirm it is to garden garden-facing elevation only and is separated from boundaries by the required distance
- Provide wall and roof U values along with window specifications
Key takeaways
- Timber frame delivers speed to a warm, tidy shell when planned well
- Moisture and fire layers are non-negotiable. Detail them early
- Lenders prefer non-combustible cladding at boundaries and often prefer masonry to the street
- Freeze design before ordering frame and windows to avoid cost creep
- Use a clear homeowner specification to get like for like quotes
- Keep a ten per cent contingency to handle unknown ground or tie-in surprises
Conclusion
A timber frame extension can be a smart way to gain space fast with strong energy performance and low disruption. By choosing the right frame system for your site, detailing moisture and fire layers correctly, planning the permission route, and fixing the specification before ordering, you set yourself up for a smooth build and a comfortable room that adds lasting value.
If you want, I can adapt the spec template to your exact house type and layout so your quotes are tighter and easier to compare.
FAQs
1- Do I need planning permission for timber frame extension?
Not always. Many modest rear and side extensions meet Permitted Development limits. Check depth, height, and boundary rules for your house type and location. Conservation areas and listed buildings have extra controls.
2- Will a timber frame feel warm and quiet?
Yes, with continuous insulation, high quality windows, and careful air sealing. Add acoustic insulation in stud zones and use quality seals around doors.
3- How long will it take to build a timber frame extension?
From first sketch to handover, allow six months or more for a simple project. The on-site shell phase is fast once foundations are done.
4- Is a timber frame safe in a fire?
With correct linings and external build ups near boundaries, timber frame can meet robust fire requirements. Building Control will sign off on the solution.
5- Can I build a timber frame extension in winter?
Yes. Timber frame relies less on long curing periods. Groundwork is still weather sensitive, so plan that phase.

