Your kitchen feels tight and cluttered. There is never enough worktop. Mealtimes collide with homework and laundry. The room is cut off from the garden and the rest of the home.
You start looking at ideas, and you hit a wall of jargon, mixed price estimates, and confusing rules. One blog says you do not need planning. Another says you do. Builders give quotes that are hard to compare. Friends warn you about delays and extras. It is easy to spend money in the wrong place.
This guide answers one core question first. What are kitchen extensions? Then it walks you through types, costs, permissions, building regulations, design choices, risks, and a simple step-by-step plan. Use it to brief a designer or builder and to keep control from day one.
What is a kitchen extension?
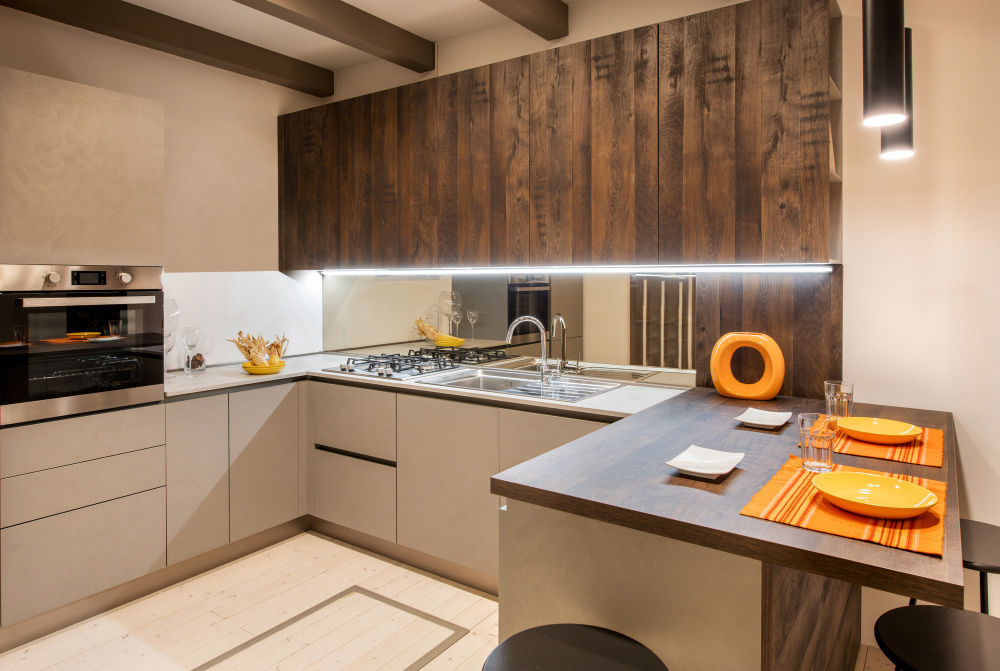
A kitchen extension is a new floor area built onto your home to make the kitchen larger or better connected to dining and living. It adds new foundations, walls, and a roof. It often opens the rear wall to create a single flowing space with bigger glazing to the garden.
This is different from a kitchen refit. A refit keeps the same footprint and only replaces units and finishes. It is also different from a conversion. A conversion turns space you already have into living space. Examples are garages or lofts.
Who it suits
- Households that want to combine cooking, dining, relaxing, and homework in one social space
- Terraced and semi-detached homes that can gain space with a side return
- Detached homes that can extend to the rear or side without losing too much garden
- Owners who prefer to avoid the cost and stress of moving
Main types of kitchen extensions
Side return extension
It is built into the narrow strip that runs along many period terraces. Usually, a modest addition in width transforms the layout.
Pros
- Turns dead space into a useful area
- Works well with rooflights for daylight
- Often possible under permitted development in many streets
Watch outs
- Party Wall process on the boundary
- Gutter, drainage, and flashings at the neighbour line
Rear extension
Extends out into the garden. Can be full-width or part-width. Works for most property types.
Pros
- Space for an island and a dining table
- Strong link to the garden with sliders or bifolds
Watch outs
- Garden size reduces
- Structural opening to the old rear wall needs careful design
Wraparound or L-shaped extension
Combines the side return and the rear to wrap around the back corner of the house.
Pros
- Large open plan footprint with room for utility and pantry
- Very flexible layouts
Watch outs
- More complex steelwork and services
- Greater planning sensitivity and more neighbour impact
Orangery and conservatory style additions
Use high levels of glazing. Orangeries have a solid structure with a roof lantern. Conservatories lean toward fully glazed roofs and walls on a brick base.
Pros
- Bright space for dining next to the kitchen
- Strong garden connection
Watch outs
- Risk of overheating and heat loss if glazing and shading are not designed well
- Position of units and services must be planned early, since many walls are glazed
Planning permission and permitted development
Many single-storey kitchen extensions can be built under permitted development. This relies on strict limits around depth, height, eaves, materials, and location on the plot. It does not apply to flats. Listed buildings and many conservation areas need planning consent. New builds can have covenants that restrict changes.
Even if you build under permitted development, apply for a Lawful Development Certificate. It proves the work was lawful at the time and helps when you sell.
If your design does not meet the limits, you will submit a householder planning application. Good drawings, context photos, and a short planning statement that covers neighbour privacy and massing will help.
Party Wall basics
If you build on or near the shared boundary, you must serve Party Wall notices. Serve at least two months before structural work. Keep neighbours informed. Share drawings. Be flexible on site access and deliveries.
Building regulations you must meet
All kitchen extensions must comply with building regulations. Key areas include structure, fire safety and escape, energy efficiency, ventilation, electrics, plumbing and drainage, and safe glazing.
There are two main routes
- Full Plans approval with detailed drawings and specifications checked before work
- Building Notice for simple work with inspections during the build
Full Plans reduces risk because the builder prices the same information, and the inspector agrees on key details in advance.
Energy and ventilation
- Insulate walls, floor, and roof to current standards
- Limit heat loss through glazing and control summer overheating
- Provide background ventilation with trickle vents where required and effective mechanical extraction at the hob
- Consider boost settings and keep duct runs short and straight
Electrics and plumbing
- New circuits must meet current standards
- Check the consumer unit capacity early
- Confirm that hot water and water pressure are adequate for extra outlets
Costs and three worked examples you can adapt
Every site and design is different. Costs depend on size, structure, glazing, finishes, ground conditions, and location. A clear budget splits into build cost, professional fees, approvals, kitchen and glazing, and contingency.
Example 1 side return in a terrace in London
- New area around 12 square metres
- Indicative build range for a simple spec that uses rooflights and a small structural opening
- Professional fees for measured survey, drawings, structural design, and building control
- Kitchen with mid-range units and worktops plus appliances
- Glazing with two rooflights and a two or three-panel door set
- Contingency at around one-fifth of the build cost to cover unknowns
Example 2 rear extension outside London with mid spec
- New area around 18 square metres
- Build range at mid level due to larger opening and insulation upgrades to the existing room
- Professional fees and approvals
- Kitchen and appliances at mid-level
- One roof lantern or three rooflights plus a three-panel slider
- Contingency at a similar level
Example 3 wraparound high spec
- New area around 30 square metres
- Higher build range due to multiple steels, drainage changes, and premium finishes
- Professional fees, including party wall surveyor and possible planning consultant
- Bespoke kitchen with quartz or sintered stone worktops and integrated lighting
- Full-width sliders, a structural glass corner, and external shading for summer comfort
- Contingency increased due to complexity
How to control spending?
Freeze scope before you ask for prices. Send the same drawings and specifications to at least three builders. Ask for a simple breakdown. Keep a change log during the build and only agree to extras in writing.
Timeline from idea to handover
- Define goals and budget for one to two weeks
List how you want to live, not just how it looks. Write must-haves and nice-to-haves. - Concept design takes two to four weeks
Scaled plans and a layout for the kitchen. Early structural and daylight strategy. - Planning or permitted development sign-off allows six to ten weeks for council decisions where needed. Lawful Development Certificates also take time.
- Technical design takes three to six weeks
Structural calculations, insulation details, an airtightness approach, service routes, and a lighting plan. Create a written specification. - Tender and contract for two to four weeks
Issue the same pack to builders. Compare like for like. Choose a fixed price contract such as JCT Home Owner. Set staged payments tied to progress. - Build on-site for eight to sixteen weeks for a single storey
Protect the existing house. Hold weekly site meetings. Keep records of changes. - Snag and handover in one to two weeks
Inspect carefully. Obtain the completion certificate and all electrical and gas certificates. Gather manuals and guarantees.
Layout and design that work daily
Daylight and comfort
Blend rooflights with large doors to bring light deep into the plan. Add shading to south and west-facing glass. Plant deciduous trees for seasonal shade. Plan cross ventilation with opening windows at two heights.
Extraction and air quality
Use an effective hood that vents outside. Keep duct runs short and avoid tight bends. Recirculating only cleans odour and leaves moisture. For airtight projects, consider a whole-house system with heat recovery.
Heating and cooling
Underfloor heating gives even warmth and frees wall space. Combine with smart controls and zoning. Concrete or tiled floors store heat from the winter sun. For summer comfort, add external shading and night ventilation.
Power and lighting
Use three layers of light. Task light for worktops. Ambient light for the room. Accent light for shelves and features. Provide generous sockets where you actually use appliances. Add a pop-up socket to the island.
Storage and flow
Deep drawers for pans. Tall pull-outs for dry goods. A pantry or utility for bulky items and laundry. Keep the main cooking zone free of through routes. Leave enough clearance around the island for safe movement.
Acoustics
Hard surfaces can echo in large rooms. Add acoustic plasterboard, soft seating, curtains, or panels to keep conversations clear.
Accessibility and future proofing
Aim for a level threshold to the garden. Choose wide door openings where possible. Keep heavy items between knee and shoulder height. Plan a ground-floor WC next to the kitchen if space allows.
Materials and finishes
- Floors: porcelain for durability, LVT for comfort, engineered timber for warmth. Check the slip rating and cleaning.
- Worktops: laminate for value, quartz or sintered stone for durability, wood for warmth with regular care.
- Cabinetry has moisture-resistant carcasses with robust hinges and runners.
- Walls and ceilings are durable paint with a wipeable finish. Consider an acoustic board for large open plans.
- External envelope focuses on insulation thickness, thermal bridge-free details, and good air tightness. A well-built, simple wall often outperforms a complex wall built poorly.
Services and hidden details that matter
- Drainage confirm depth and route early. You may need a build-over agreement if near a public sewer.
- Electrics check the consumer unit capacity and earthing. Plan circuit loading for ovens, induction hobs, and underfloor heating.
- Water test mains pressure and flow rate. Add a booster if needed for multiple outlets.
- Fire safety linked smoke alarms, escape routes, and fire-rated doors where required.
- Security laminated glass to accessible doors and windows, and quality locks.
- Connectivity plan hardwired data points for stable internet and media.
How to hire and protect yourself
Routes to build
- Design and build one firm that handles design and construction. Single point of contact.
- Traditionally, you appoint a designer who prepares a full pack. You tender to builders.
Getting prices
Share the same drawings, specifications, and finishes schedule. Ask for references and visit a live site. Request proof of insurance. Avoid unclear day rates. Seek a fixed price with a programme and milestones.
Contracts and payments
Use a written contract. Set staged payments linked to completed stages such as foundations, structure, roof on, first fix, plaster, second fix, and practical completion. Keep a small retention until snagging is complete.
Insurance and warranties
Arrange site insurance that covers the works and the existing home. The builder must have public liability and employers’ liability. A structural warranty helps future buyers feel confident.
Neighbours and good relations
Share sketches early. Listen to concerns about privacy and light. Keep scaffolds within your boundary where possible. Agree on delivery times. Keep the pavement clean. Good relations reduce delays and stress.
Risks and red flags checklist
- Unknown ground conditions or tree roots
- Old drains in the footprint that need diversions
- Asbestos in old ceilings or tiles
- Overheating from large west-facing glass without shading
- Long lead times on kitchens and glazing
- Vague quotes filled with provisional sums
- No clear plan for building control inspections.
Step-by-step action plan
- Define needs and budget range
- Measure the existing space and photograph it
- Commission a concept design and a planning route check
- Confirm permitted development or prepare a planning application
- Produce technical drawings and structural design
- Tender to at least three builders with the same pack
- Choose a fixed price contract and set milestone payments
- Order kitchen, glazing, and other long lead items early
- Protect the house and agree on site rules before demolition
- Hold weekly site meetings and record changes
- Snag, collect certificates, and complete handover
Final word
Kitchen extensions come down to creating a better daily life. Plan the right type for your home, get the rules right, protect your budget, and focus on comfort and daylight. With the steps and checklists above, you can reach handover with a space that works every day of the week.

